Navigating the Self assessment
How to navigate the new B Impact experience?
The certification setup experience will take you through a personalized questionnaire to check your company's eligibility for certification and understand the scope of your company's operations. By getting to know more about your company, we'll be able to tailor your assessment to your company's size, industry, and location.
Once you've completed all sections, you will receive your company's assessment and can start measuring your company's impact.
Get Started
1. Gather company documents
2. Eligibility: Ownership Type
Provide company information
4. Scoping: Customize Your Assessment
If you have selected skip set up, your view will not include steps 1 through 3 which are required for certification. See How to opt into B Corp certification, in order to assess your eligibility for B Corp certification.
Navigating between sections or viewing a particular section can be done by selecting ‘back to setup’.
You are able to save information as you have it available and input information once it is readily available to you.
If the information provided requires B Lab’s analysis, the subsequent sections of the set up process will be available in a view only mode, and not editable until B Lab’s team has reviewed it. You may see an eye icon and ‘view section’ instead of an option to edit the section. This may be the result if the section is ‘view only’ because a B Lab analyst is reviewing your results.
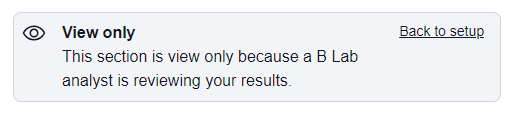
Users are able to edit each section unless the section is locked for analyst review. This information will be visible at the top of the page.
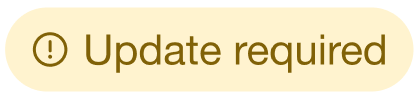
An overview of certification setup experience statuses:
How do I opt into the Self Assessment?
If you have an existing account on bimpactassessment.net this article will guide you to opting into the new standards.
From the Home page, you will see a card that reads Get ready for the new standards! Select the “Get started” button to view the toggle menu.
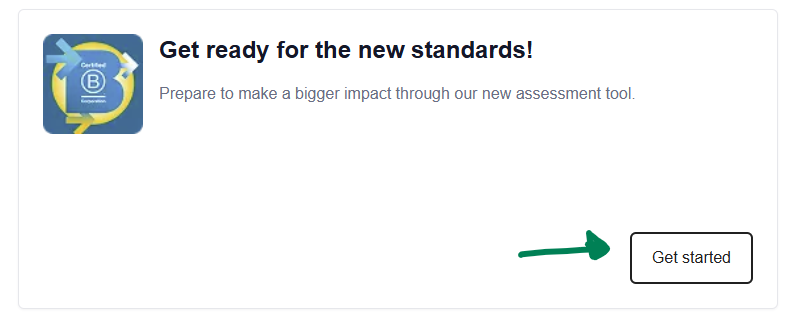
or a card that reads Keep exploring the new standards! Select the “Continue” button to view the toggle menu.

The toggle menu will disclaim a few aspects of the new assessment and share some key guides on continuing through the process. You can find these guides in our Understanding the New Standards folder.
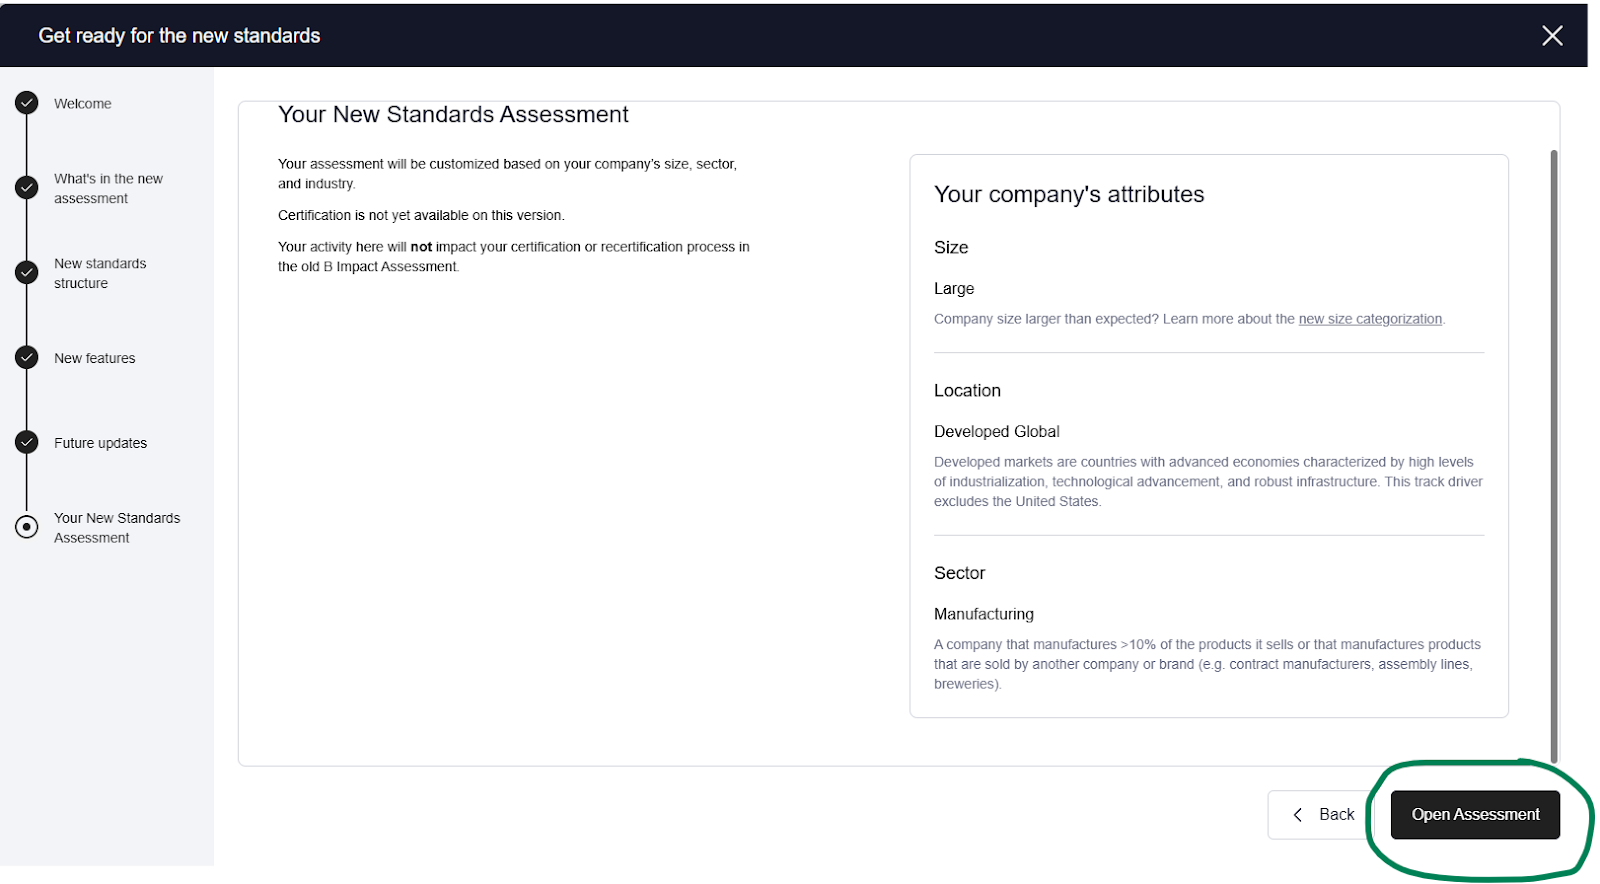
Once you reach the Your New Standards Assessment we encourage you to review the right sided menu listing Your company’s attributes. These attributes will select the appropriate view of the new standards for you. If you find the attributes to be in error, please visit the setup process and review the Customize your assessment stage. Once you have confirmed your company’s attributes, select “Open Assessment”.
Once this is selected, the left sided menu will include Self Assessment at the bottom for easy reference.
How can I use the dashboard in self assessment?
Using the different features automatically populates your dashboard. Access the assessment dashboard (through the left hand menu) for a centralized view of your overall progress. This makes it easier to track progress at a glance, identify bottlenecks, and manage completion across teams.
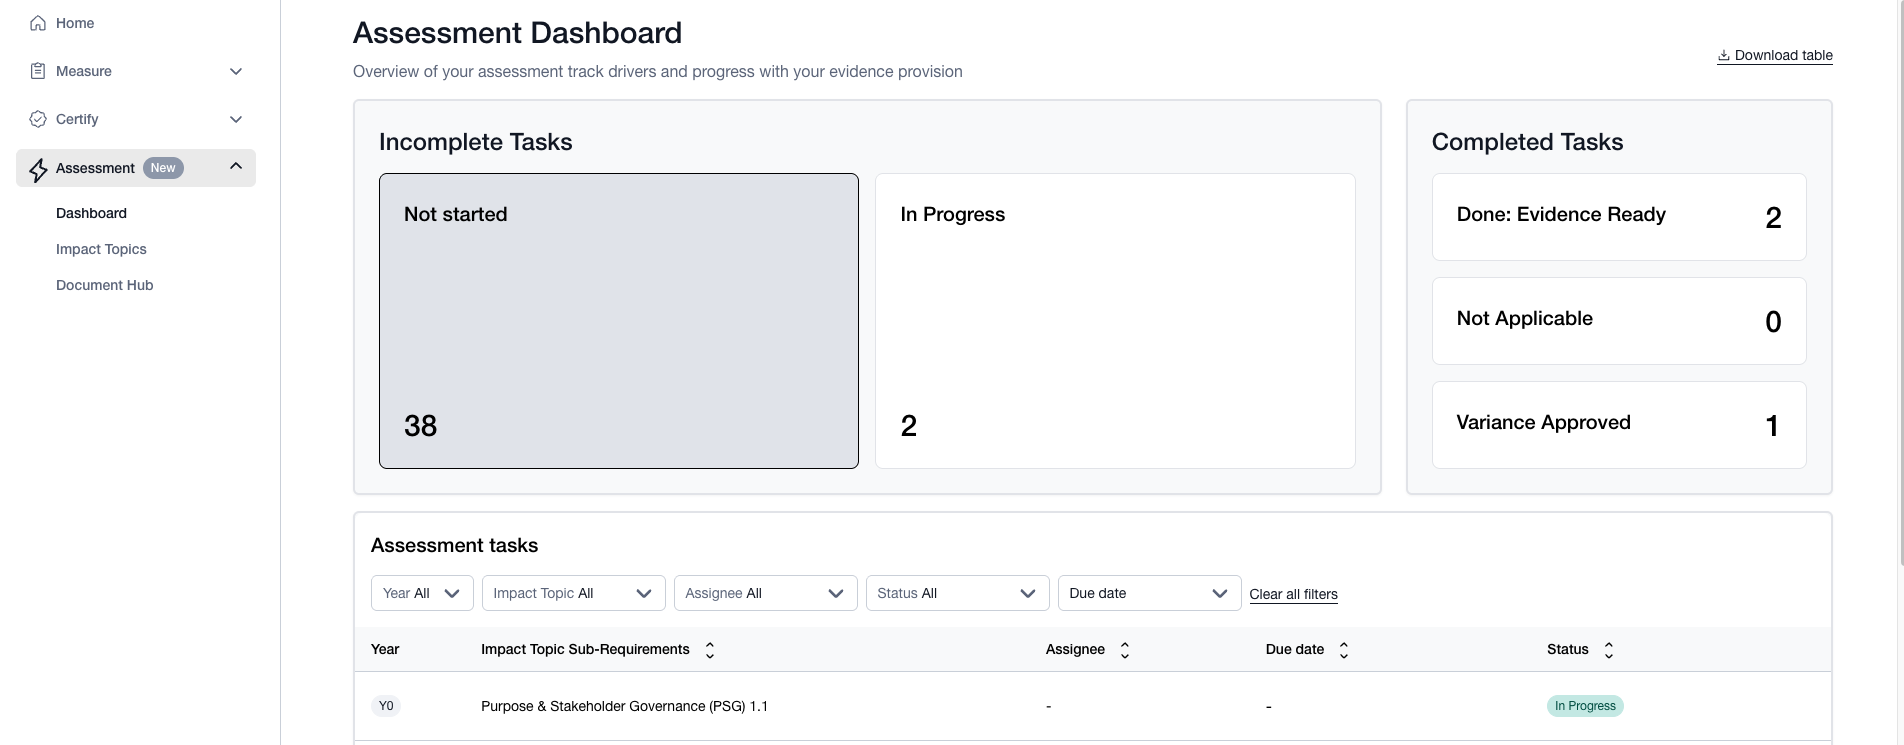
The features in the dashboard show the company’s progress on meeting the sub requirements, categorized in the following cards:
Incomplete Tasks which include those that are “Not Started” and “In Progress”.
Completed Tasks which include those that are “Done: Evidence Ready” and those that may be "Not Applicable".
These statuses are mainly used by you and your team members and are not reviewed by B Lab or the Assurance providers until the audit phase has started.
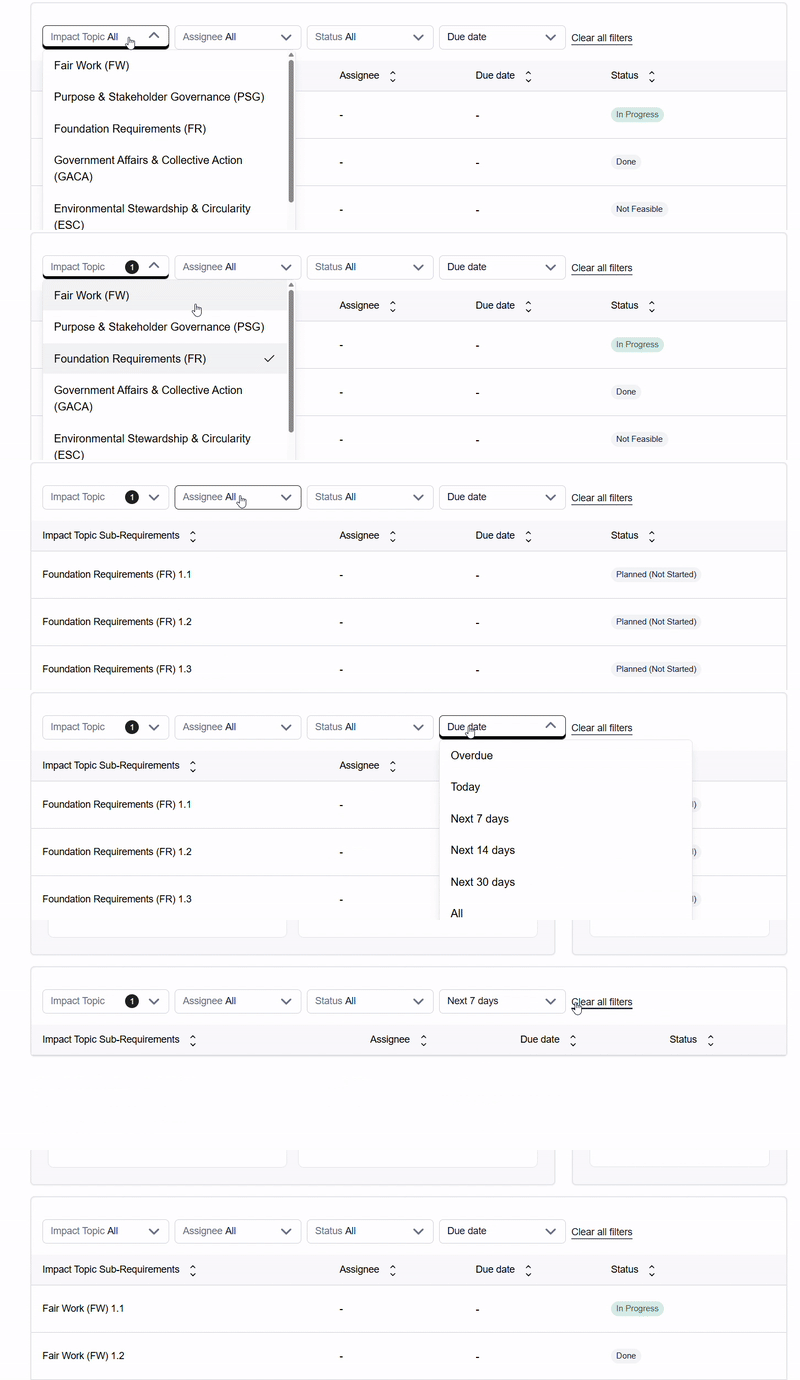
The main section of the dashboard offers a filter on the following categories:
- Impact Topic
- Assignee
- Status
- Due date
Learn more about how to track a requirement in the Self assessment.
How to use the status field for sub-requirements
All requirements visible on your self assessment dashboard will be able to have individual tracking.
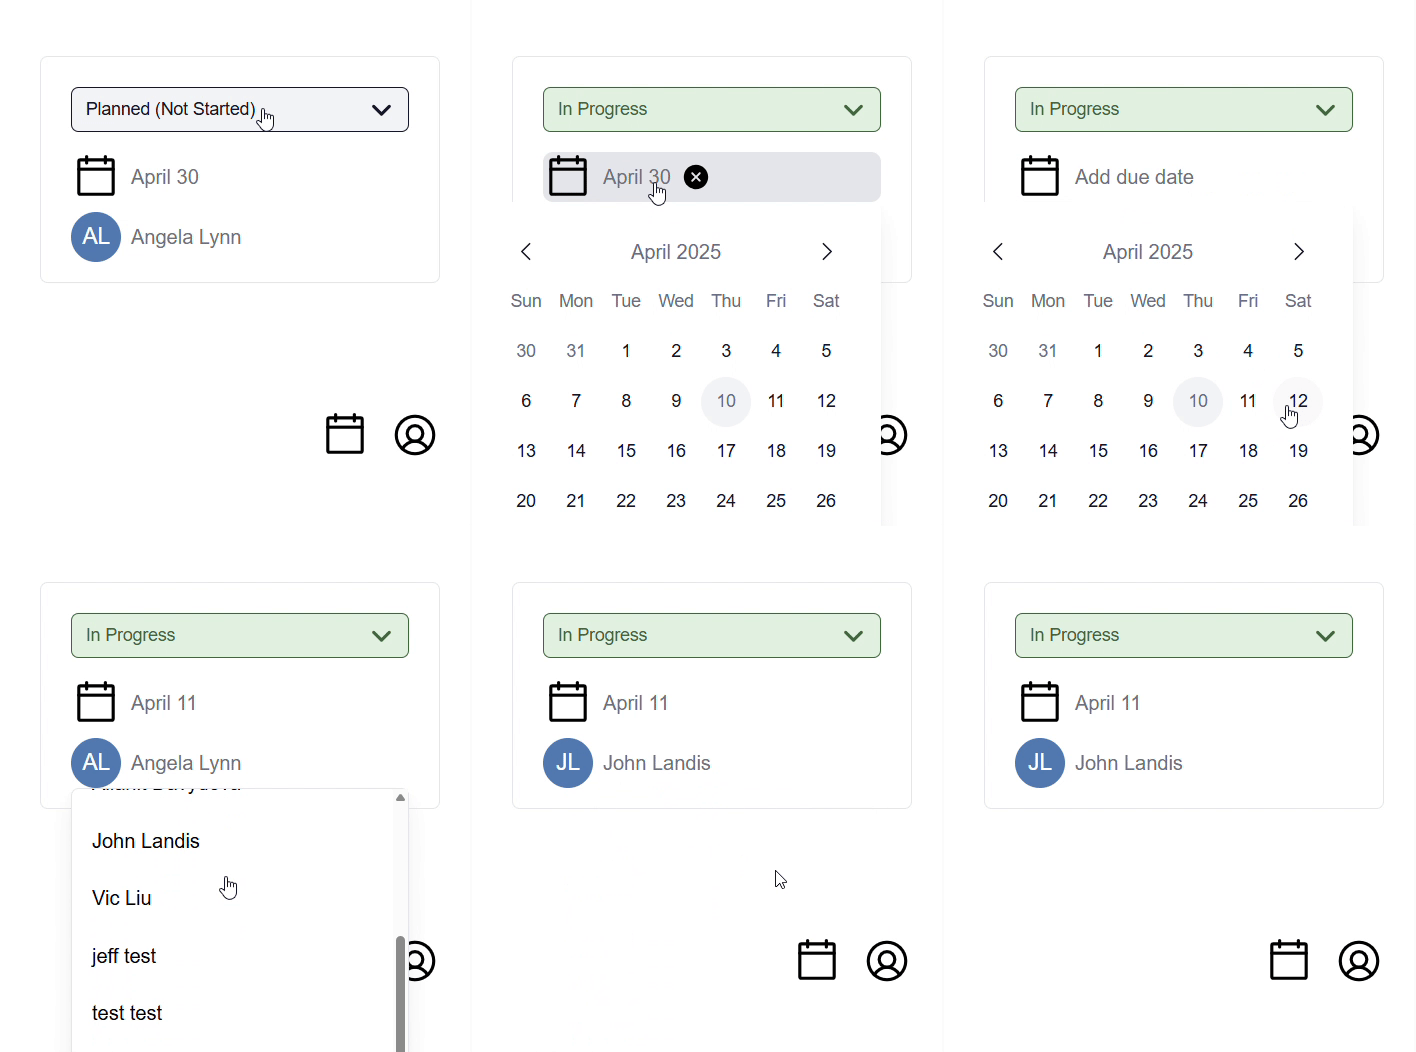
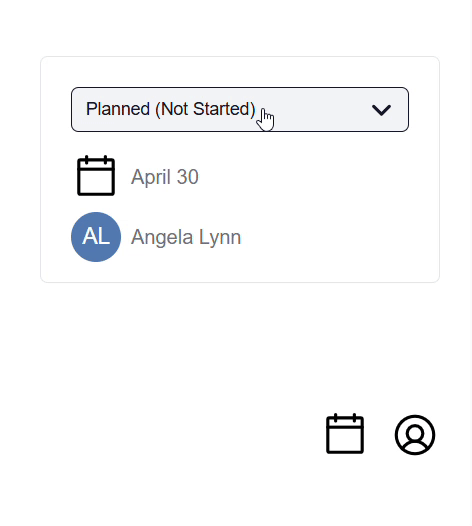
Status selections are not reviewed by B Lab but may be a useful project management tool to track your company’s readiness to submit for audit. You can review the overview of the statuses available for your management for each sub-requirement and see what is appropriate based on how the sub-requirement applies.
The individual requirement will have features that will help companies do the following:
Choose an Assignee of the requirement which will be a Team Member who is part of the company’s profile. This will help individual team members keep track of the requirements they can support best.
Determine a due date which can be for a variety of milestones, some can be related to documentation providing or compiling of records and so on.
Select a status which can show to all or other team members which requirements need particular attention.
The compliance criteria captures the specific data and records that will provide verification for the completion of the requirement. You can select “view action items” to add specific due dates and assignees as well as uploading evidence directly.
This is also a key place to engage with your team by notifying them in the comments.
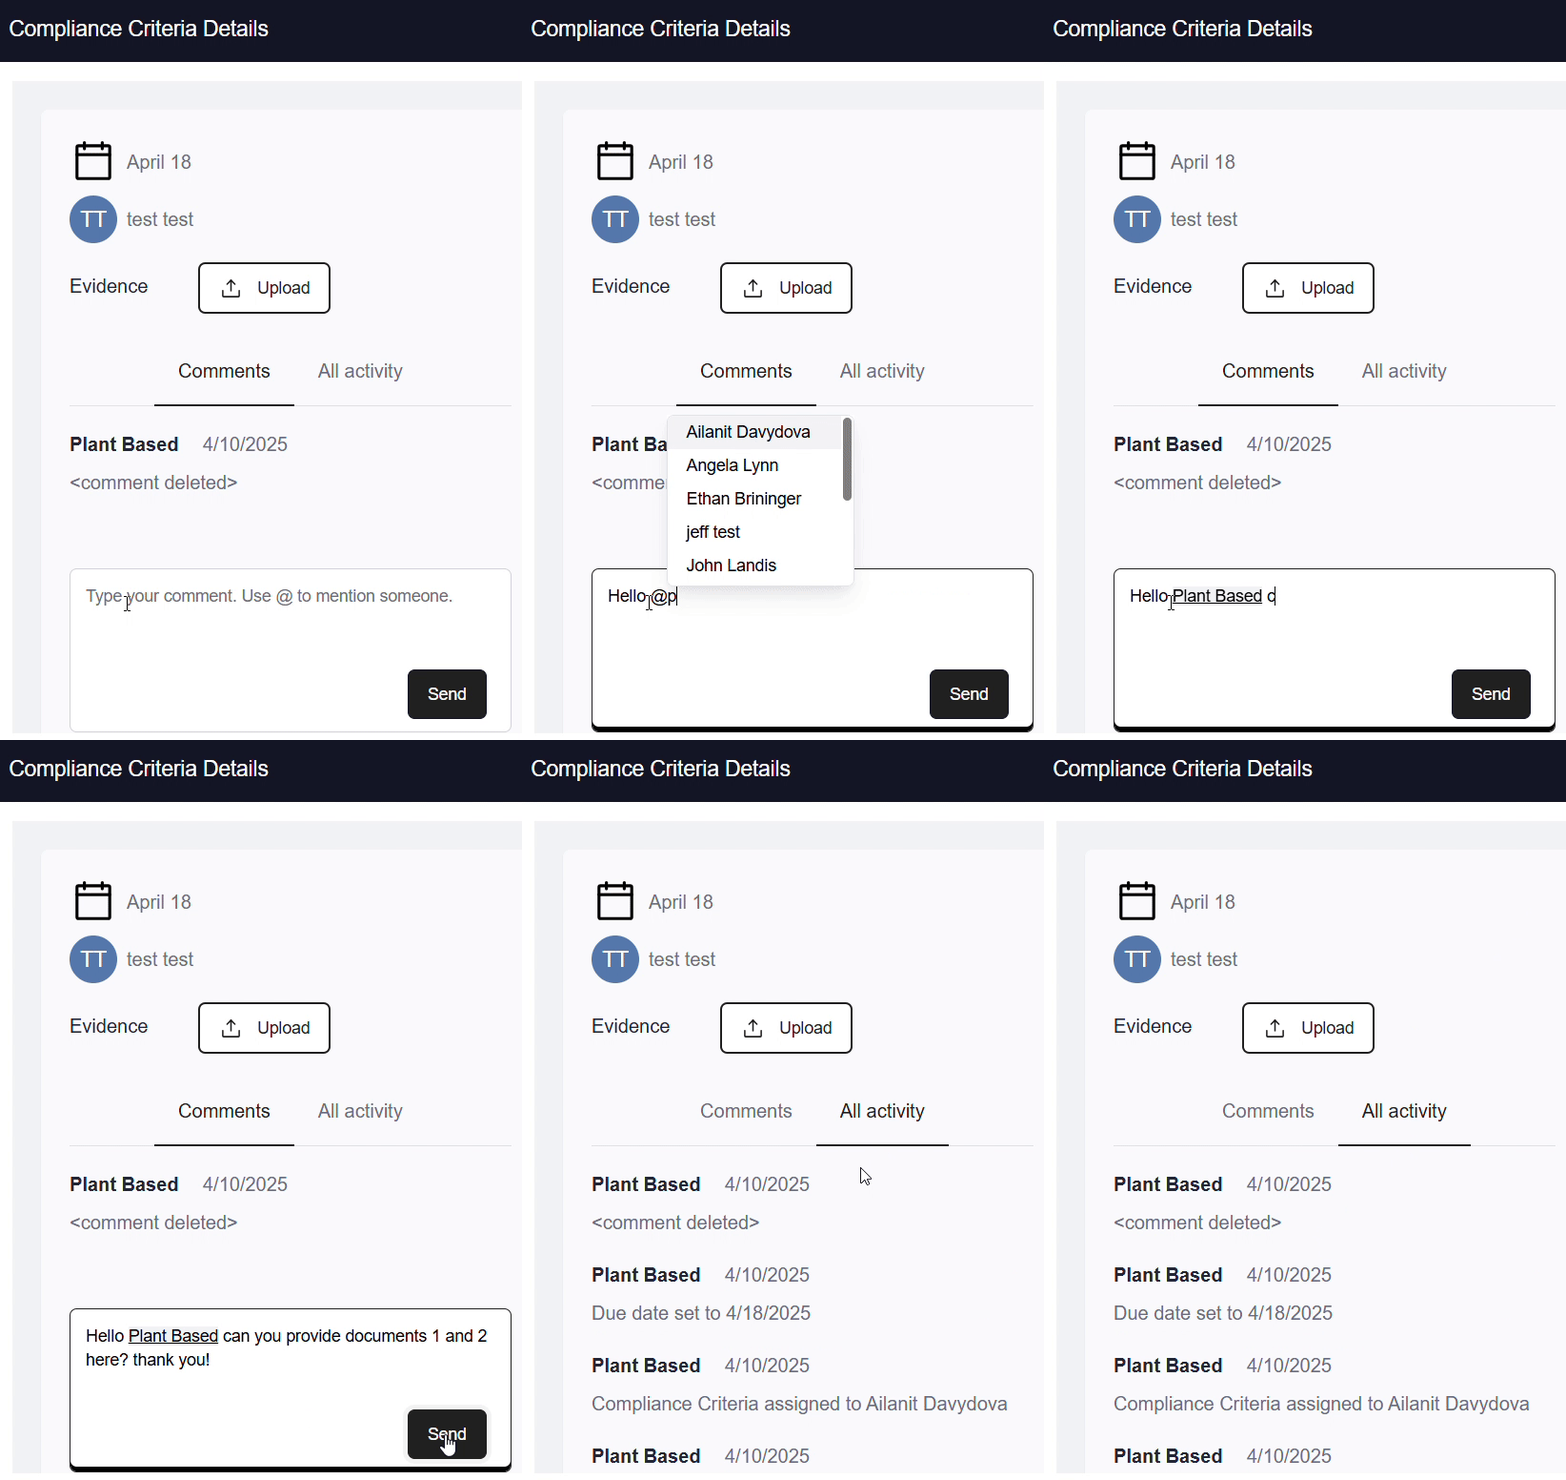
The compliance criteria card is also where you can provide documentation.
How to upload and manage documents in B Impact
When completing the assessment in B Impact, you will need to upload evidence for each sub-requirement of the B Lab Standards. You can upload evidence directly while completing the self-assessment, or upload documents centrally through the Document Hub. Regardless of where you upload a document, all documents are stored in the Document Hub, where you can view and manage them in one place.
Upload evidence from the Assessment
When completing a sub-requirement, you can upload evidence directly to the relevant compliance criterion.
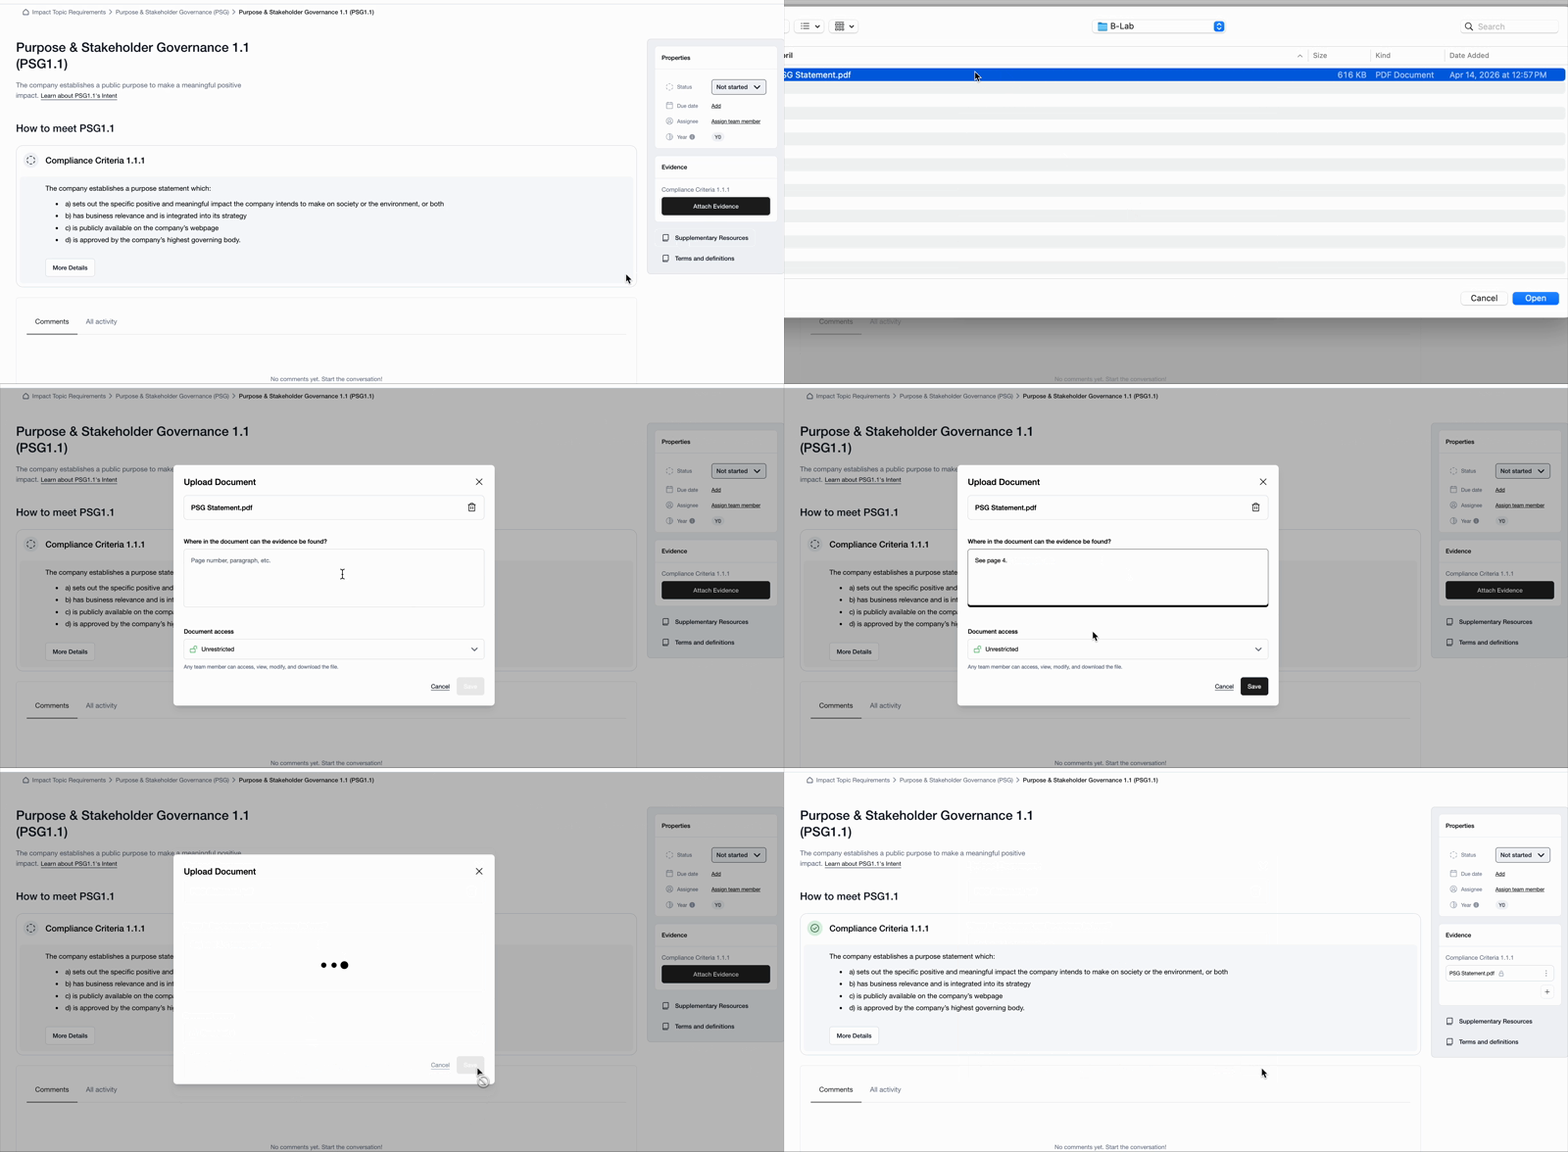
Go to the relevant Impact Topic and select the specific sub-requirement.
Select View details.
In the Evidence section on the left side of the page, find the relevant compliance criterion.
Select Attach Evidence
Select a file from your computer, or choose a document that has already been uploaded to the Document Hub.
Briefly describe where the relevant information can be found in the document. For example, include the page number or section.
Set document access: If you're a B Impact account admin, you can control who can access sensitive documents. Under Document access, select the appropriate access level:
Unrestricted: All team members can view, modify, and download the document.
Restricted: Only admins can view, modify, and download the document.
Once uploaded, the document is available in the Document Hub, where you can view and manage it along with your other documents. You can change a document's access settings later from the Document Hub.
Upload and manage documents in the Document Hub
The Document Hub provides a central view of all documents uploaded to your B Impact account. From here, you can see which Impact Topic a document is associated with, who uploaded it, and manage its settings.
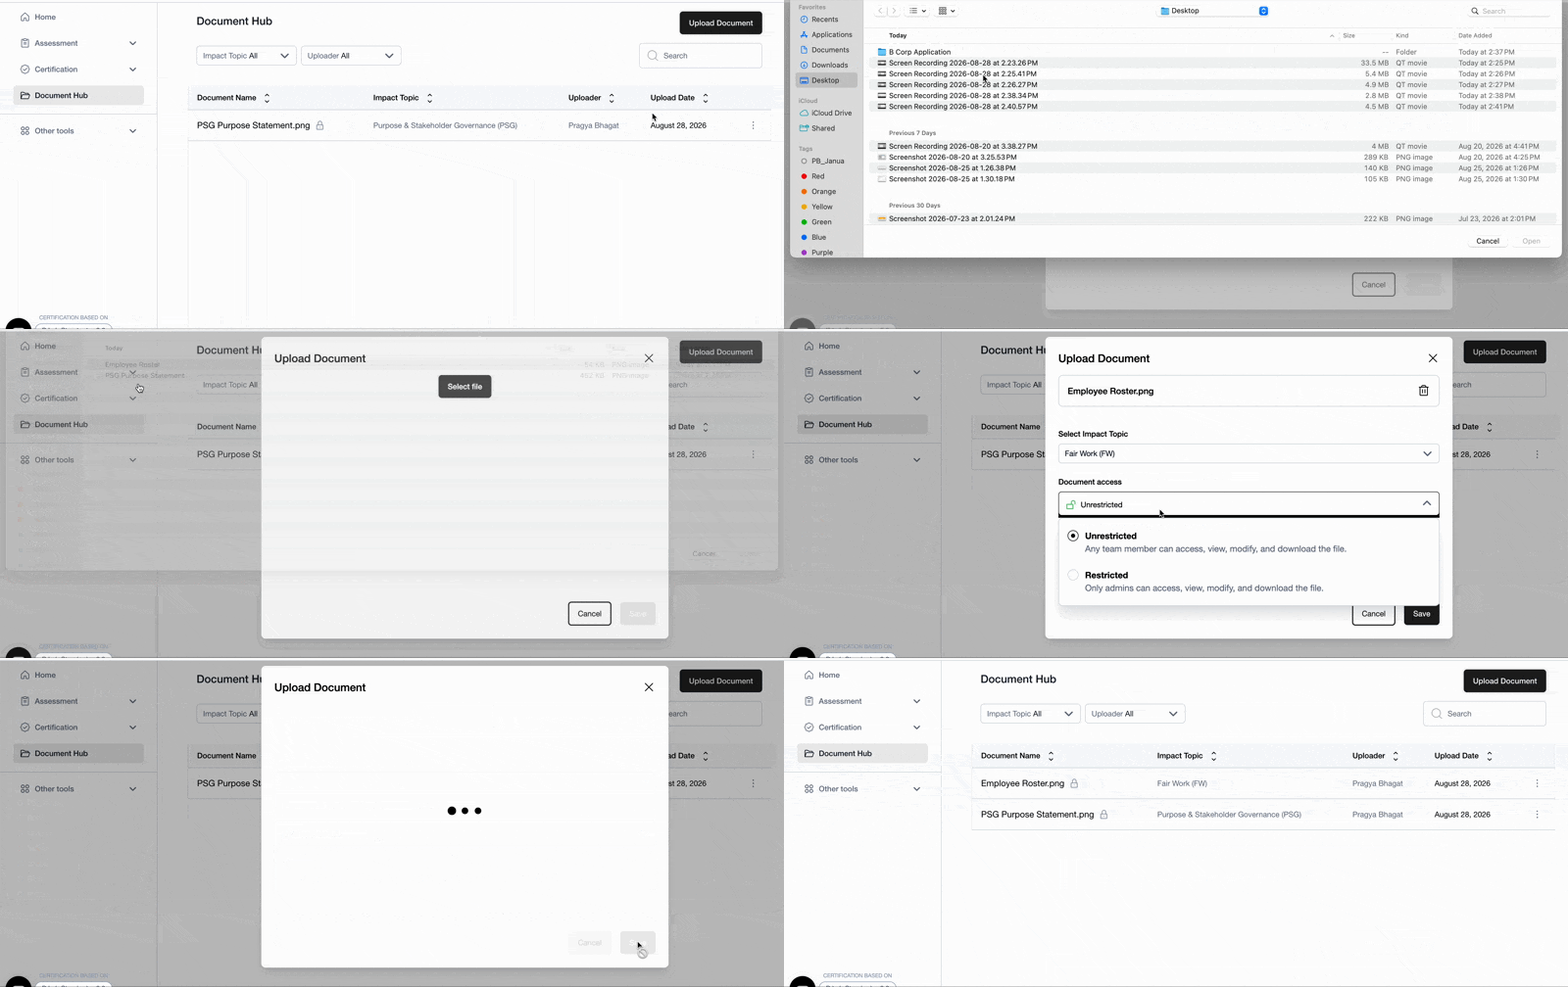
You can upload documents directly to the Document Hub and link them to relevant sub-requirements later.
Upload a document
Go to the Document Hub and select the Upload document button in the top-right corner.
Select a file from your computer.
Select the Impact Topic the document is associated with.
Briefly describe where the relevant information can be found in the document.
Under Document access, select the appropriate access level:
Unrestricted: All team members can view, modify, and download the document.
Restricted: Only admins can view, modify, and download the document.
Select Upload.
Link documents to requirements
After uploading a document, you can link it to one or more sub-requirements and compliance criteria.
Find the document in the Document Hub.
Select the three dots next to the document.
Select View and modify.
Link the document to the relevant sub-requirement(s) and compliance criteria.
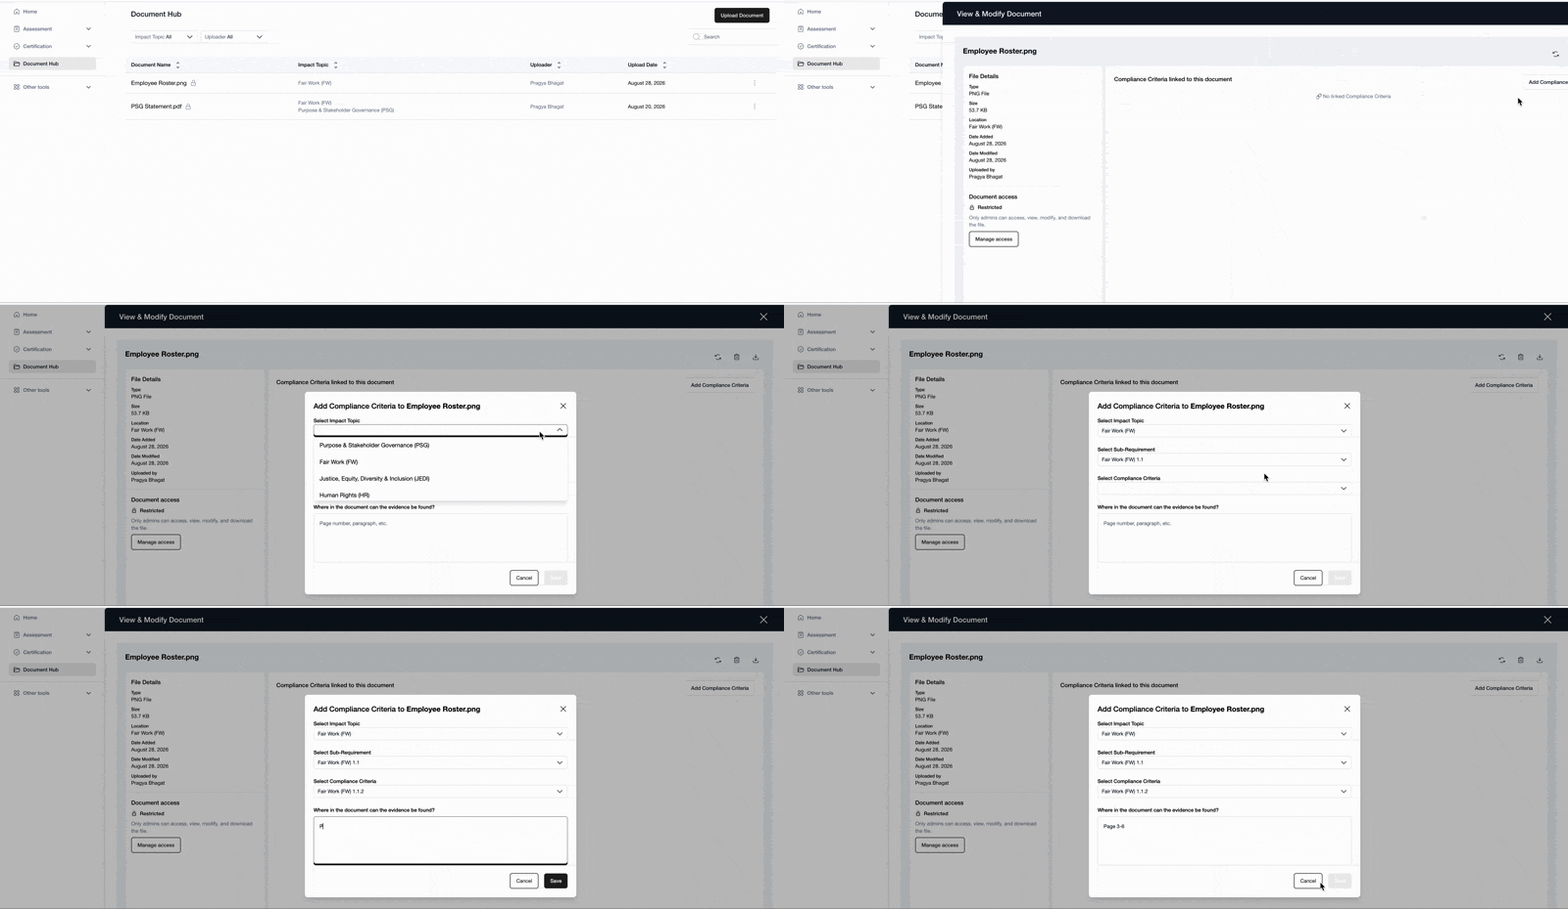
A single document can be linked to multiple compliance criteria across different Impact Topics. This means you only need to upload a document once, even if it is relevant to multiple requirements.
Find and manage documents
The Document Hub gives you a central place to manage all documents uploaded to your account. You can:
Filter documents by Impact Topic or Uploader.
Download documents.
Change document access settings.
View and modify which requirements a document is linked to.
To manage a document, select the three dots next to it and choose View and modify.