When completing the assessment in B Impact, you will need to upload evidence for each sub-requirement of the B Lab Standards. You can upload evidence directly while completing the self-assessment, or upload documents centrally through the Document Hub. Regardless of where you upload a document, all documents are stored in the Document Hub, where you can view and manage them in one place.
Upload evidence from the Assessment
When completing a sub-requirement, you can upload evidence directly to the relevant compliance criterion.
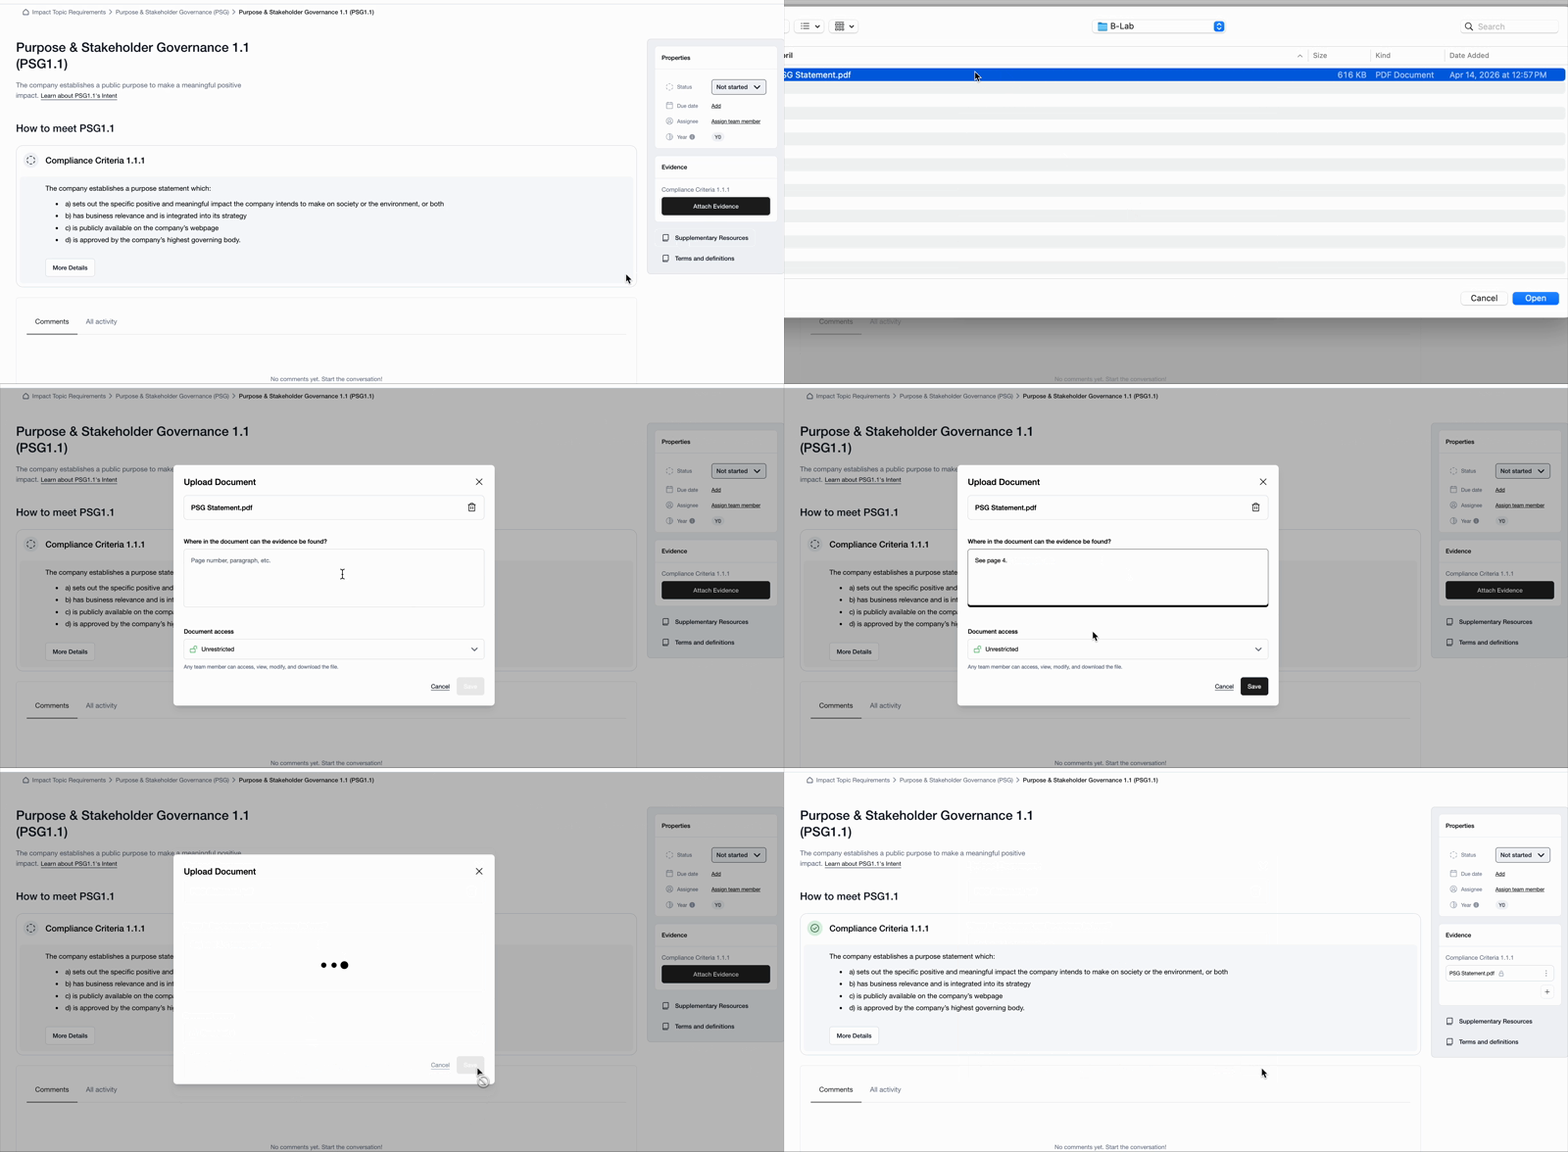
Go to the relevant Impact Topic and select the specific sub-requirement.
Select View details.
In the Evidence section on the left side of the page, find the relevant compliance criterion.
Select Attach Evidence
Select a file from your computer, or choose a document that has already been uploaded to the Document Hub.
Briefly describe where the relevant information can be found in the document. For example, include the page number or section.
Set document access: If you're a B Impact account admin, you can control who can access sensitive documents. Under Document access, select the appropriate access level:
Unrestricted: All team members can view, modify, and download the document.
Restricted: Only admins can view, modify, and download the document.
Once uploaded, the document is available in the Document Hub, where you can view and manage it along with your other documents. You can change a document's access settings later from the Document Hub.
Upload and manage documents in the Document Hub
The Document Hub provides a central view of all documents uploaded to your B Impact account. From here, you can see which Impact Topic a document is associated with, who uploaded it, and manage its settings.
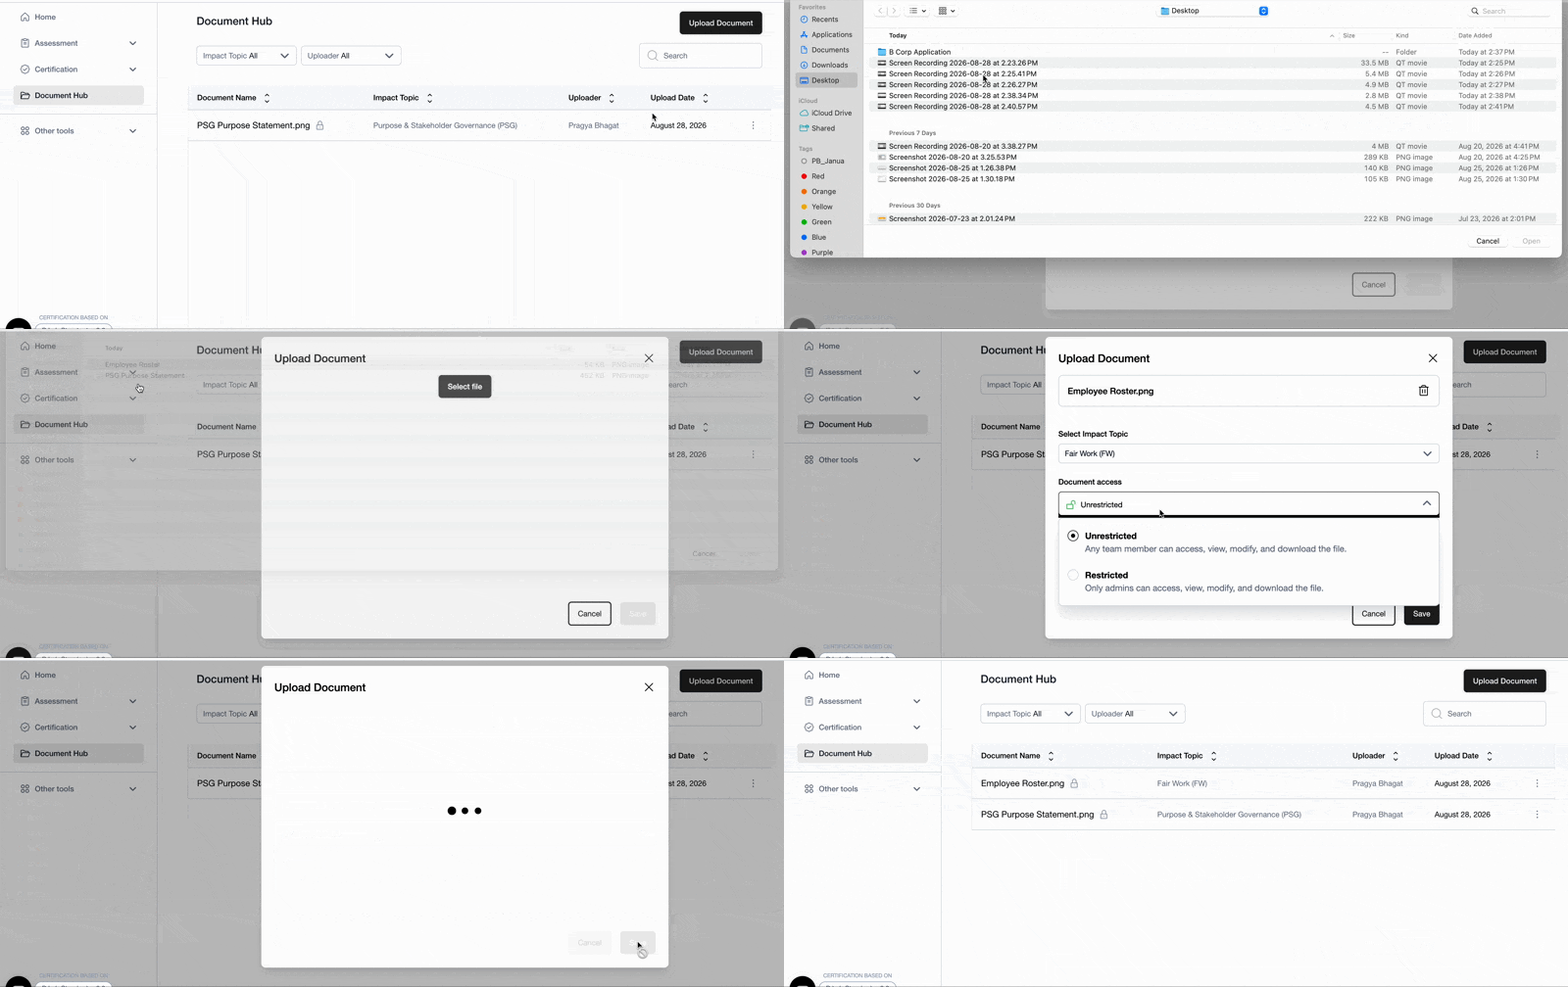
You can upload documents directly to the Document Hub and link them to relevant sub-requirements later.
Upload a document
Go to the Document Hub and select the Upload document button in the top-right corner.
Select a file from your computer.
Select the Impact Topic the document is associated with.
Briefly describe where the relevant information can be found in the document.
Under Document access, select the appropriate access level:
Unrestricted: All team members can view, modify, and download the document.
Restricted: Only admins can view, modify, and download the document.
Select Upload.
Link documents to requirements
After uploading a document, you can link it to one or more sub-requirements and compliance criteria.
Find the document in the Document Hub.
Select the three dots next to the document.
Select View and modify.
Link the document to the relevant sub-requirement(s) and compliance criteria.
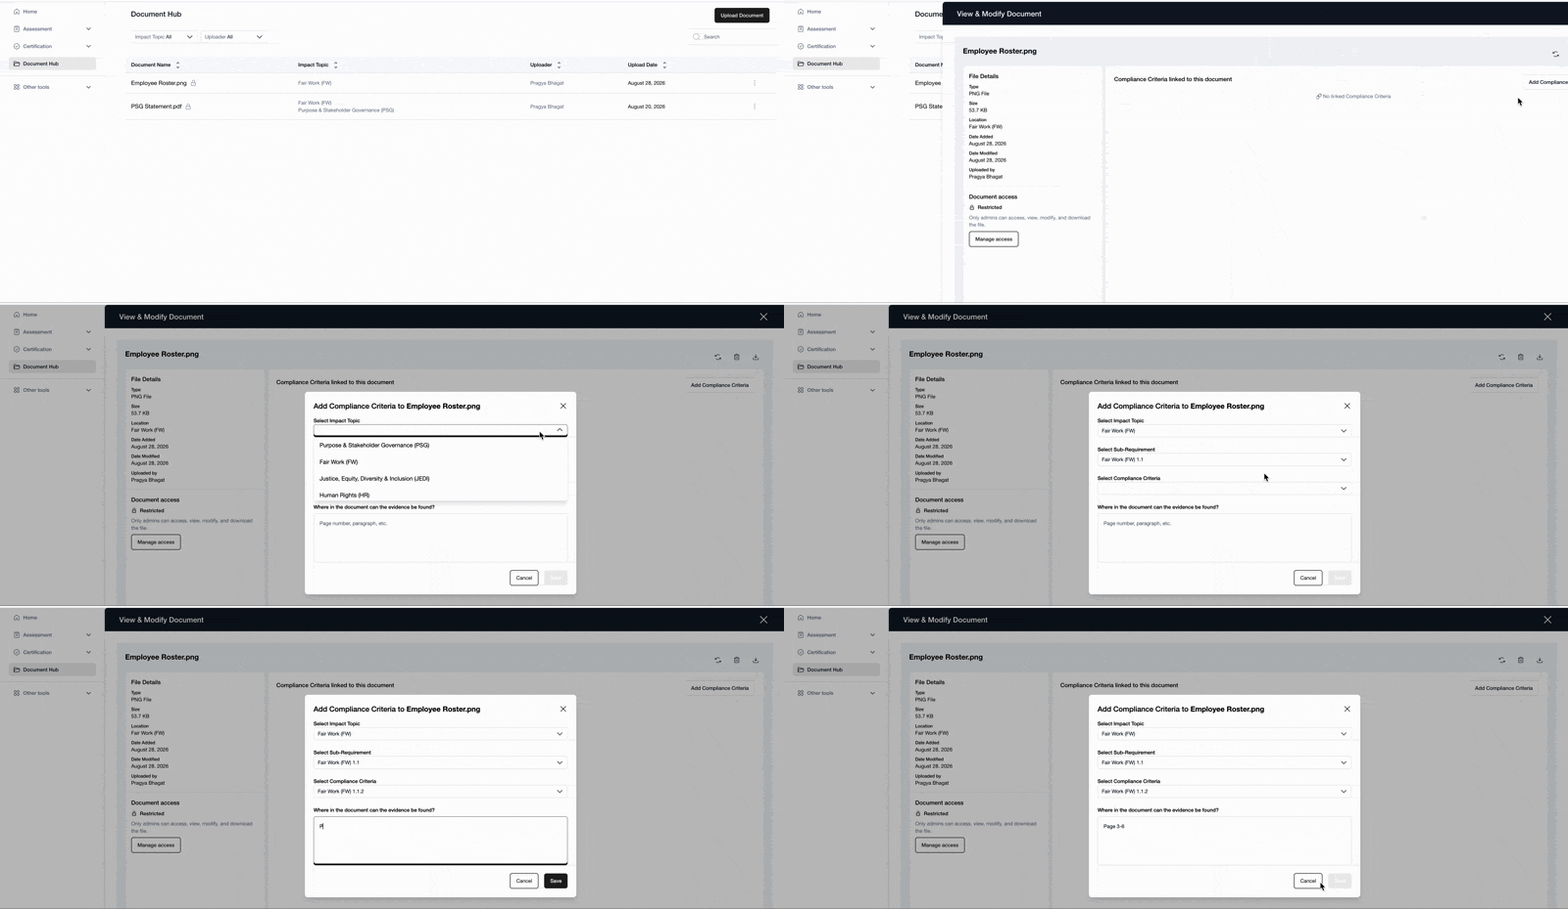
A single document can be linked to multiple compliance criteria across different Impact Topics. This means you only need to upload a document once, even if it is relevant to multiple requirements.
Find and manage documents
The Document Hub gives you a central place to manage all documents uploaded to your account. You can:
Filter documents by Impact Topic or Uploader.
Download documents.
Change document access settings.
View and modify which requirements a document is linked to.
To manage a document, select the three dots next to it and choose View and modify.
Was this article helpful?
That’s Great!
Thank you for your feedback
Sorry! We couldn't be helpful
Thank you for your feedback
Feedback sent
We appreciate your effort and will try to fix the article